There is a specific moment in early December when the holiday catalogs arrive in the mail. You flip through the glossy pages, land on the gourmet food section, and gasp. A tin of Peppermint Bark—sugar, chocolate, and mint—is selling for upwards of $30 or $40 per pound.
As a professional chocolatier who has spent two decades working with couverture chocolate and sugar work, I am here to tell you a secret: You are paying for the tin, not the chocolate.
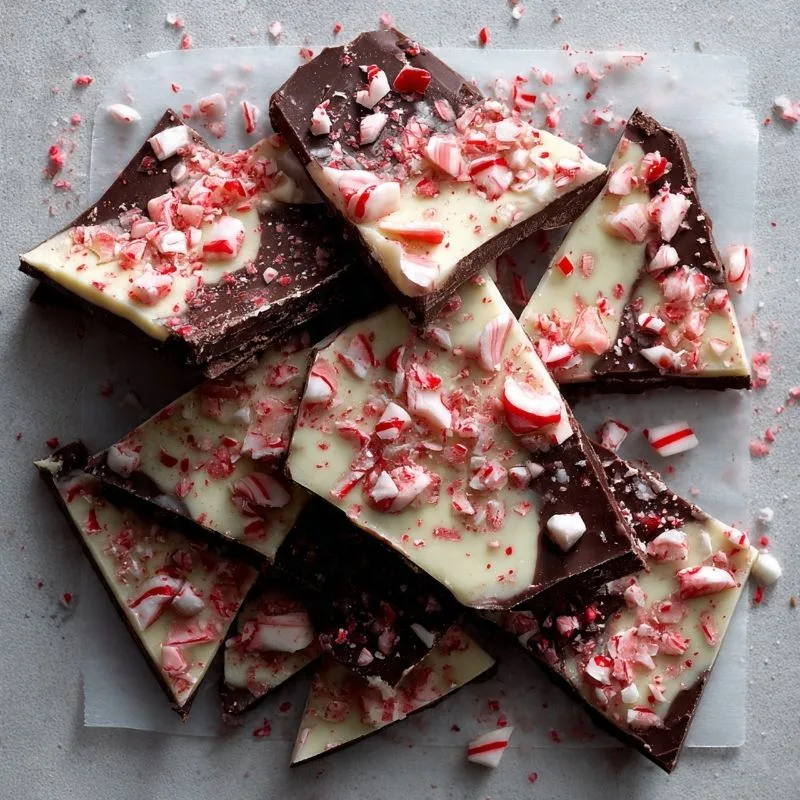
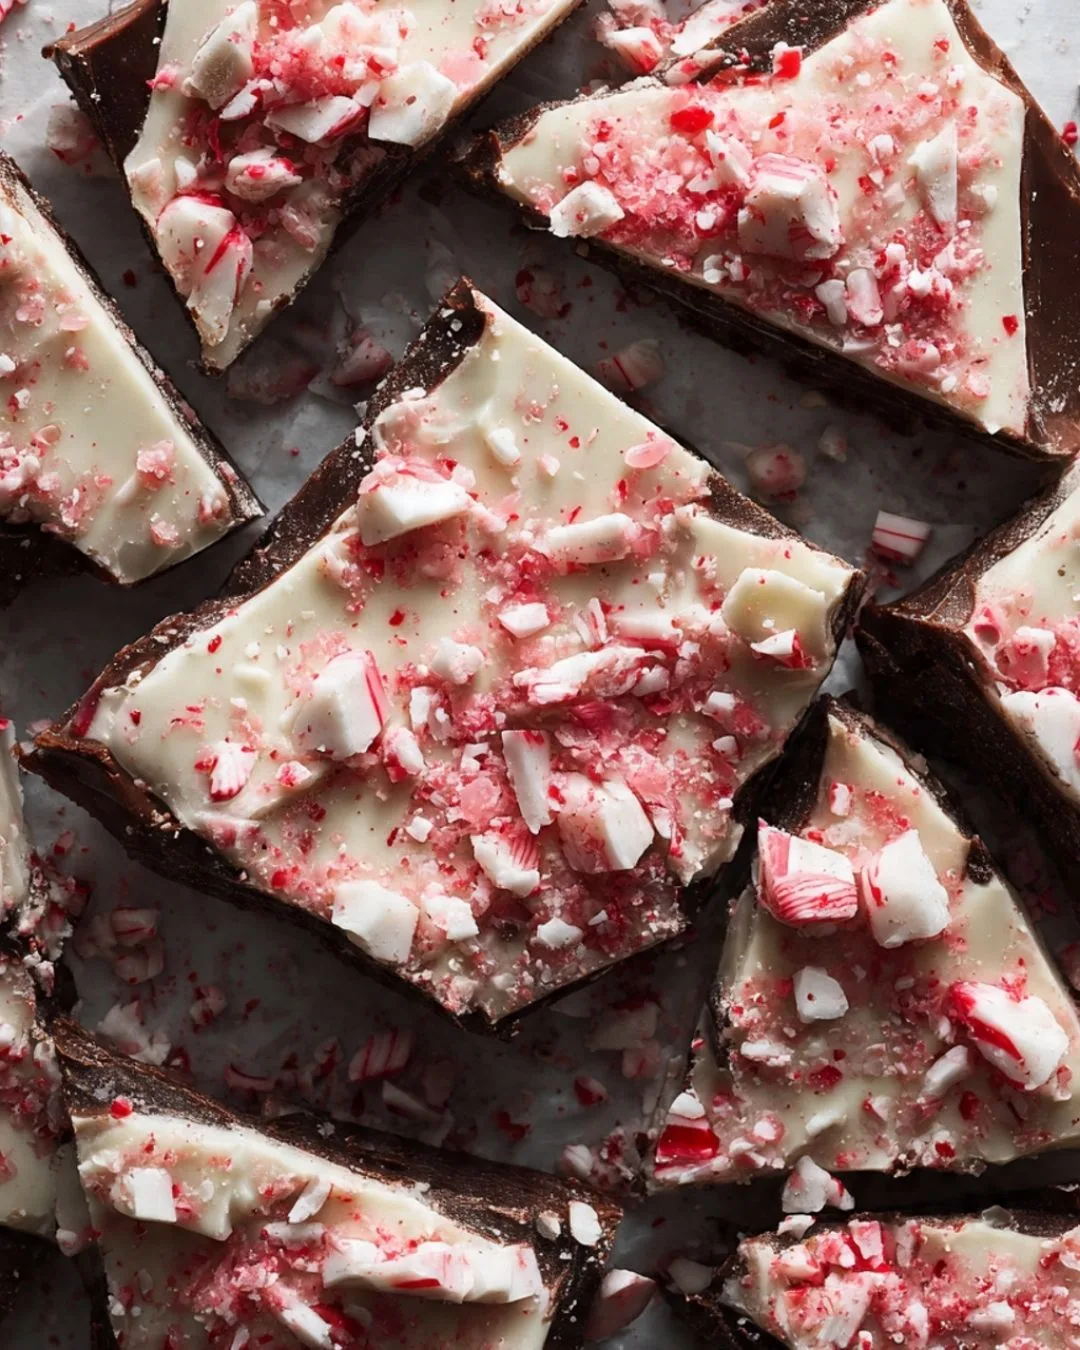
Peppermint Bark is the quintessential holiday gift. It is visually stunning, with its jagged shards of dark and white chocolate topped with ruby-red crushed candies. It hits that perfect flavor profile of deep, bitter cocoa, creamy vanilla sweetness, and the cooling crunch of peppermint. But the reason it is so expensive to buy is that it is surprisingly technical to manufacture perfectly.
We have all had bad bark. You know the kind—where you take a bite and the white chocolate layer pops cleanly off the dark chocolate layer, leaving you with two separate candy bars. Or the kind where the white chocolate is waxy and doesn’t melt in your mouth.
My mission with this guide to the Best 3-Ingredient Peppermint Bark Recipe is to give you the technical know-how to make a version that is superior to anything you can buy in a store. We are going to tackle the science of chocolate bonding, ingredient selection, and temperature control.
This bark is perfect for gifting; pack it in a tin alongside our Gingerbread Cheesecake Bites for Menopause for the ultimate holiday treat box that balances creamy, spicy, and crunchy textures.

3-Ingredient Peppermint Bark
Ingredients
Method
- Melt the Dark Chocolate
- Add dark chocolate to a microwave-safe bowl.
- Microwave in 20–30 second intervals, stirring until silky.
- Pour onto a parchment-lined baking sheet and spread into a rectangle.
- Melt the White Chocolate
- Melt the white chocolate the same way (short bursts, stirring).
- Let the dark chocolate layer set for 5 minutes so it doesn’t swirl.
- Pour the white chocolate on top and smooth it evenly.
- Add the Peppermint
- Immediately sprinkle the crushed candy canes over the top.
- Gently press them down so they stick.
- Set
- Refrigerate 15–20 minutes or until firm.
- Break into rustic pieces.
Notes
Choosing Chocolate for the Best 3-Ingredient Peppermint Bark Recipe
Because there are only three ingredients in this recipe, there is nowhere to hide. If you use low-quality chocolate, you will have a low-quality product. However, as a chocolatier, I also know that “quality” doesn’t always mean the most expensive bar on the shelf—it means the right product for the application.
The Dark Layer: Semi-Sweet is the Sweet Spot
For the bottom layer, you want a chocolate with a cocoa percentage between 55% and 60%. This provides a bitter counterpoint to the extremely sweet white chocolate and candy layer.
-
Chips vs. Bars: I strongly advise against using standard chocolate chips for bark. Chocolate chips contain stabilizers (like soy lecithin) that are designed to help the chip hold its shape in a cookie at 350°F. When you melt them down for bark, they result in a thick, sludge-like consistency that is hard to spread thin.
-
The Recommendation: Use high-quality baking bars (like Lindt or Ghirardelli) or “Couverture” wafers. If you must use chips, look for high-end brands like Guittard, which have fewer stabilizers.
The White Chocolate Layer: The Tricky Part
This is where most home cooks struggle. Real white chocolate is made of cocoa butter, milk solids, and sugar. It is notoriously temperamental and scorches easily.
-
Melting Wafers (Compound Chocolate): If you are a beginner, or if you want to ensure your bark has a glossy snap without the hassle of “tempering,” I recommend using Ghirardelli White Melting Wafers. These are technically a compound coating (using vegetable oil instead of pure cocoa butter), but the flavor is excellent, and they melt flawlessly.
-
Real White Chocolate: If you choose to use real white chocolate bars containing cocoa butter, you must be vigilant about temperature. If it gets too hot, it becomes grainy. Ghirardelli provides an excellent guide on the difference between wafers and chips and why wafers are often the pro’s choice for coating and bark.
The Peppermint: Canes vs. Mints
Believe it or not, there is a difference.
-
Candy Canes: These are aerated as they are pulled, meaning they are easier to crush and provide a lighter crunch.
-
Starlight Mints: These are solid hard candies. They are much harder to crush and can sometimes be tacky/sticky on the teeth. Stick to traditional canes for the Best 3-Ingredient Peppermint Bark Recipe.
How to Keep Layers Together in the Best 3-Ingredient Peppermint Bark Recipe
The number one failure in making peppermint bark is delamination—when the white layer separates from the dark layer after cooling. This happens due to “Thermal Shock” and condensation.
The Science of Bonding
Chocolate shrinks as it sets. If you pour a hot liquid (110°F white chocolate) onto a freezing cold solid (a dark chocolate layer you just took out of the freezer), two things happen:
-
Thermal Shock: The white chocolate sets instantly upon contact, preventing it from bonding or “marrying” with the dark chocolate molecules.
-
Condensation: If the dark chocolate is too cold, moisture from the air condenses on its surface. As we discussed in other articles, water is the enemy of chocolate. That microscopic layer of water acts as a barrier, ensuring the layers will pop apart later.
The “Sweet Spot” Technique
To ensure your Best 3-Ingredient Peppermint Bark Recipe holds together, you must pour the white layer when the dark layer is set, but not cold.
You want the dark layer to be firm to the touch (matte finish), but still slightly pliable at room temperature. We call this the “tacky state.” This allows the warmth of the white chocolate to melt the very top micron of the dark chocolate, fusing the two layers together into a single, cohesive bar.
How to Make the Best 3-Ingredient Peppermint Bark Recipe Step-by-Step
[IMAGE: A baking sheet lined with parchment paper, showing the dark chocolate layer spread out and setting, with a bowl of melted white chocolate ready to pour.]
Step 1: Prep and Polish
Line a large baking sheet with parchment paper or a silicone mat.
Chef’s Tip: If you are crushing your own candy canes, do it now. Place them in a zip-top bag and whack them with a rolling pin or meat mallet. Sift the crushed candy. You want the small shards, but you want to discard the fine “peppermint dust.” The dust makes the top of the bark look cloudy and pink rather than snowy white.
-
Internal Link: Don’t throw away that peppermint dust! Save some of your crushed peppermint dust to sprinkle over our stunning Frozen Cranberry Pavlova. It adds a festive sparkle to the meringue.
Step 2: The Dark Foundation
Place 12 oz of semi-sweet chocolate (chopped bars or wafers) in a microwave-safe bowl.
Microwave in 30-second intervals, stirring vigorously in between. Even if it looks solid, stir it. The residual heat melts the lumps. If you overheat it, the chocolate will bloom (turn gray/streaky).
Pour the chocolate onto the parchment. Using an offset spatula, spread it into a rectangle about 1/4-inch thick.
The Set: Let this sit at room temperature for 20 minutes. If your kitchen is hot, place it in the fridge for exactly 10 minutes, then bring it back out. Do not freeze it solid.
Step 3: The White Cap
Once the dark layer is set but room temp (the “Sweet Spot”), melt your 12 oz of white chocolate wafers using the same 30-second interval method. Warning: White chocolate burns faster than dark. Stir often.
Pour the white chocolate directly over the dark layer.
Technique: Work quickly. Use your spatula to gently spread the white chocolate to the edges. Do not over-work it, or you will melt the dark layer underneath and create swirls. We want clean layers.
Step 4: The Garnish
Immediately—and I mean immediately—sprinkle your crushed peppermint candy over the wet white chocolate.
Take your hand and gently press the candy into the chocolate. If you just sprinkle it, the candy will fall off when you break the bark. You want it embedded.
Step 5: The Final Cure
Now, you can put the tray in the refrigerator. Let it set completely for at least 45 minutes until it snaps when you try to lift the edge.
Troubleshooting Your Best 3-Ingredient Peppermint Bark Recipe
Even with a simple recipe, things can go wrong. Here is how to fix common chocolate disasters.
Problem: My Chocolate “Seized” (Turned into a grainy, hard paste).
-
The Cause: Water. Even one drop of water falling into melted chocolate causes the sugar and cocoa particles to clump together instantly.
-
The Fix: Sadly, you cannot use this for coating anymore. However, you can save the ingredient! Add heavy cream to it and turn it into a ganache or truffle center. Do not try to add oil to smooth it out; the texture will remain gritty.
Problem: White Streaks Appear on the Chocolate (Blooming).
-
The Cause: The chocolate got too hot, separating the cocoa butter from the solids. As it cooled, the fat rose to the surface.
-
The Fix: If you are using real chocolate (not wafers), you need to temper it. Tempering involves heating and cooling chocolate to specific temperatures to align the crystal structure. For those interested in the advanced method, The Spruce Eats has a definitive guide on how to temper chocolate. For this recipe, using Melting Wafers prevents this issue entirely.
Problem: The Bark is Bendy, Not Snappy.
-
The Cause: Your kitchen is too warm, or the chocolate didn’t set long enough.
-
The Fix: Keep the bark in the fridge. Chocolate with a high milk fat content (like white chocolate) is naturally softer at room temperature than dark chocolate.
Gifting Your Best 3-Ingredient Peppermint Bark Recipe
This bark is the ultimate edible gift because it ships well and stays fresh for weeks.
Packaging:
Break the bark into large, organic shards. I prefer breaking it by hand rather than cutting it with a knife, as the knife can shatter the peppermint pieces and smear the layers.
Stack the shards in clear cellophane bags tied with red ribbon, or place them in gold tins lined with wax paper.
Menu Planning:
If you are hosting a holiday party, serve this sweet treat after a round of savory appetizers like our Easy Make-Ahead Pineapple Cranberry Cheese Log. The peppermint acts as a palate cleanser after the rich cheese and nuts.
FAQ: Common Peppermint Bark Questions
Q: Can I add Peppermint Extract to the chocolate?
A: Yes, you can, but be careful. You must use an oil-based peppermint flavoring. Standard peppermint extract from the grocery store is alcohol-based (water). If you put alcohol-based extract into melting chocolate, it will seize (see Troubleshooting above). If you want extra mint flavor, mix 1/4 teaspoon of oil-based flavoring into the dark chocolate layer.
Q: How long does homemade peppermint bark last?
A: If stored in an airtight container in a cool, dark place (like a pantry), it will last for 3 to 4 weeks. If you live in a hot climate, store it in the fridge, but be aware that it might “sweat” (develop condensation) when you take it out.
Q: Why isn’t my white chocolate melting?
A: White chocolate has a very low burning point (around 110°F). If you zap it in the microwave for 1 minute straight, you have likely burned it. It won’t look black, but it will become thick and refuse to flow. Always melt in short bursts and stir, stir, stir.
Q: Can I use milk chocolate instead of dark?
A: You can, but it will be very sweet. The beauty of the Best 3-Ingredient Peppermint Bark Recipe is the contrast between the bitter dark chocolate and the sweet white layer. If you use milk chocolate, you lose that balance.