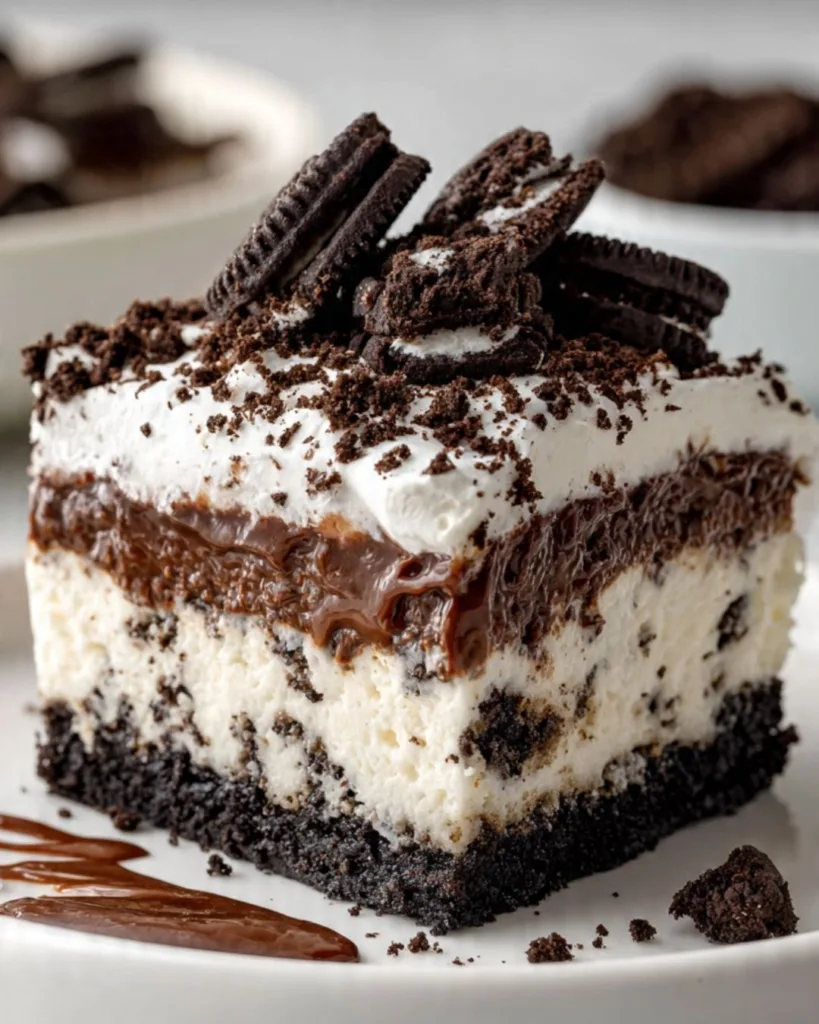
It goes by many names. You might know it as “Oreo Delight,” “Chocolate Lush,” or simply “Heaven in a Pan.” But in my kitchen, we call it the Easy No-Bake Oreo Lasagna Dessert.
As a pastry chef with over 20 years of experience catering holiday parties and summer potlucks, I can tell you that this is the undisputed heavyweight champion of crowd-pleasing desserts. There is something primal about the combination of textures: the gritty, buttery crunch of the cookie crust, the tangy richness of the cheesecake layer, the silky smoothness of chocolate pudding, and the cloud-like finish of the whipped topping.
The appeal is obvious. It requires zero oven time, making it a lifesaver during the holidays when your oven is occupied by turkeys or roasts, and equally essential in July when it is simply too hot to bake. Furthermore, this is a dessert that benefits from “aging.” Making it 24 to 48 hours in advance actually improves the flavor and texture, allowing the moisture from the filling to soften the crust just enough to make it sliceable.
However, be warned: this dessert is incredibly rich. I always recommend balancing your menu. This dessert is incredibly rich, so pair it with a refreshing, tart drink like our Menopause-Friendly Sparkling Pomegranate Mocktail to cleanse the palate between bites.
🍫 OREO LASAGNA (No-Bake!)
Ingredients
Method
- Make the Crust
- Add the 48 Oreos (whole, with filling) to a food processor.
- Pulse into fine crumbs.
- Mix with melted butter until evenly coated.
- Press firmly into the bottom of a 9×13 dish.
- Chill in the fridge while you prepare the next layers.
- Cream Cheese Layer
- Beat cream cheese until smooth.
- Add powdered sugar + vanilla and mix until creamy.
- Fold in the Cool Whip.
- Stir in the 6 crushed Oreos.
- Spread gently over the chilled crust.
- Chocolate Pudding Layer
- In a bowl, whisk the instant pudding and half & half until thickened (1–2 minutes).
- Stir in the 6 crushed Oreos.
- Spread the pudding mixture over the cream cheese layer.
- Final Topping
- Spread 8 oz Cool Whip evenly over the pudding layer.
- Sprinkle crushed or chopped Oreos on top.
- Chill
- Refrigerate for at least 4 hours, or overnight for the cleanest slices.
Notes
How to Keep Your Easy No-Bake Oreo Lasagna Dessert from Sliding
The biggest complaint I hear from home cooks about layered icebox desserts is structural failure. You cut a slice, and the layers slide apart, creating a messy pile on the plate rather than a stunning distinct “lasagna” look. To achieve the perfect slice, we have to respect the science of layer stability.
The Physics of Chill Time
Each layer of this Easy No-Bake Oreo Lasagna Dessert has a different viscosity and fat content. If you layer them all immediately one after another, they will bleed together. The “Cheesecake” layer (cream cheese and sugar) is dense. The “Pudding” layer is fluid until it sets.
The Rule: You must freeze the crust for 10 minutes before adding the cream cheese. Then, you must refrigerate the cream cheese layer for 10 minutes before adding the pudding. This creates a “skin” or a thermal barrier that prevents the layers from mixing.
Pudding Chemistry: Instant vs. Cook & Serve
This is the most critical scientific distinction. You MUST use Instant Pudding Mix.
Instant pudding contains pre-gelatinized starch (usually modified cornstarch). This starch absorbs liquid instantly and thickens without heat.
“Cook & Serve” pudding contains regular cornstarch, which requires boiling to activate thickening. If you use “Cook & Serve” and pour warm pudding over your cream cheese layer, the heat will melt the butter in the cream cheese filling, causing the entire dessert to liquefy and collapse. For a deeper understanding of how starches thicken in dairy, The Spruce Eats offers a fantastic guide on pudding science.
The Dairy Factor: Increasing Viscosity
Most pudding boxes call for 2 cups of milk per box. For this Easy No-Bake Oreo Lasagna Dessert, that is too thin. We want a sliceable pudding, not a spoonable one.
My Chef’s Secret: I reduce the liquid slightly and swap 50% of the milk for Half & Half. The higher fat content in the Half & Half creates a tighter emulsion with the pudding starch, resulting in a firm, velvet-textured layer that holds the weight of the whipped topping without bulging out the sides.
Ingredients for the Best Easy No-Bake Oreo Lasagna Dessert
A recipe with no baking relies entirely on the quality and selection of ingredients. Here is the breakdown of what to buy.
1. The Oreos: Regular vs. Double Stuf
While “Double Stuf” Oreos are delicious for snacking, they are detrimental to a crust. The ratio of “cream” (sugar and vegetable oil) to “cookie” is too high. If you use them for the crust, your base will be greasy and slide around the bottom of the pan. Stick to Regular Oreos for the perfect structural integrity. You can find nutritional breakdowns and product types on the official Oreo website.
2. The Cream Cheese: Block Style Only
Do not use “Spread” or “Whipped” cream cheese from a tub. These products have air incorporated into them and a higher water content. When mixed with sugar, they become soupy. You need Full-Fat Brick Cream Cheese.
-
Prep Tip: The cream cheese must be softened to true room temperature. If it is cold, it will not blend with the sugar, and you will end up with tiny white lumps in your filling.
3. The Stabilizer: Cool Whip vs. Homemade
I am a pastry chef, so I usually advocate for real whipped cream. However, for an icebox cake that needs to last 3-4 days in the fridge, Cool Whip (Whipped Topping) is scientifically superior.
Real whipped cream (even when stabilized) tends to weep (release water) after 24 hours. Cool Whip contains vegetable oils and gums that are designed to hold their structure indefinitely. If you want that creamy, scoopable texture in a dip format, check out our High-Protein Christmas Cake Batter Dip, which utilizes similar stabilization techniques for a fluffy texture.
Chef’s Compromise: If you absolutely hate Cool Whip, you can make stabilized whipped cream by dissolving 1 teaspoon of unflavored gelatin in 1 tablespoon of water and whipping it into heavy cream.
How to Make Easy No-Bake Oreo Lasagna Dessert Step-by-Step
[IMAGE: Process shot showing the cream cheese layer being spread over the black cookie crust with an offset spatula.]
Step 1: The Structural Crust
Place 36 Oreos (the entire standard package) into a food processor. Pulse until they are fine crumbs. Don’t remove the cream filling; blend it all.
Drizzle in 1/2 cup (1 stick) of melted butter. Pulse until the mixture looks like wet sand.
Dump this into a 9×13 inch baking dish.
The Packing Technique: Do not just pat it with your fingers. Take the bottom of a measuring cup or a glass and press down hard. You want a compact, solid layer. Place the pan in the freezer for 10 minutes to set the butter.
Step 2: The Cheesecake Layer
In a large bowl, beat the softened cream cheese with 1 cup of powdered sugar and 1 teaspoon of vanilla extract until smooth.
Fold in 1 cup of the Cool Whip (or whipped cream).
Technique: Use a rubber spatula to fold, not whisk. We want to keep the air in the mixture so it stays fluffy.
Spread this gently over the chilled crust. Be careful not to pull up the crumbs. Place back in the fridge for 10 minutes.
Step 3: The Chocolate Pudding Layer
In a medium bowl, whisk together 2 packages (3.9 oz each) of Instant Chocolate Pudding and 3 cups of cold milk (or a milk/half-and-half blend).
Whisk for 2 minutes until it starts to thicken.
Pour this over the cream cheese layer. Use an offset spatula to smooth it edge-to-edge. Let this sit for 5 minutes to firm up.
Step 4: The Topping and Garnish
Top with the remaining Cool Whip. Spread it into luscious swoops and swirls.
Garnish Rule: If you are serving this immediately, sprinkle crushed Oreos or chocolate chips on top now. If you are serving this tomorrow, wait to garnish. The humidity of the fridge will make the cookie crumbs soft and soggy if they sit overnight.
How to Cut Perfect Slices of Easy No-Bake Oreo Lasagna Dessert
We eat with our eyes first. A messy, smeared slice is delicious, but a clean, layered slice is professional. Here is how to get that “lasagna” look.
1. The Deep Freeze
About 30 to 45 minutes before you plan to serve the Easy No-Bake Oreo Lasagna Dessert, place the entire 9×13 pan in the freezer. This firms up the fat in the cream cheese and the whipped topping, allowing the knife to pass through without dragging the layers.
2. The Hot Knife Method
Fill a tall pitcher with very hot water. Dip a sharp chef’s knife into the water, wipe it dry with a paper towel, and make one cut.
Wipe the knife clean after every single cut.
Yes, it is tedious. But if you don’t wipe the knife, the black Oreo crumbs and brown pudding will smear across the white cheesecake layer of the next slice, ruining the visual effect.
Variations for Easy No-Bake Oreo Lasagna Dessert
This recipe is a blank canvas. By changing the Oreos and the pudding flavor, you can adapt this for any holiday.
1. The Mint Chocolate Christmas Version
Use Mint Oreos for the crust. Add 1/2 teaspoon of peppermint extract and a few drops of green food coloring to the Cheesecake Layer. Top with Andes Mints.
2. The Golden Vanilla Version
Use Golden Oreos for the crust. Use Vanilla or White Chocolate pudding instead of Chocolate. This creates a monochromatic, elegant dessert that tastes like birthday cake.
3. The Peanut Butter Lover
Use Nutter Butters or Peanut Butter Oreos for the crust. Add 1/2 cup of creamy peanut butter to the Cheesecake Layer. Top with chopped Reese’s cups.
4. The Baked Alternative
If you love the look of layers but prefer a traditional baked cake for Christmas, try our Moist Old-Fashioned Gingerbread Layer Cake. It offers the same dramatic height and layered presentation but with warming spices and a baked texture.
FAQ: Common Questions About Oreo Lasagna
Q: Can I make this gluten-free?
A: Yes! Oreo now makes a certified Gluten-Free Oreo. Use those for the crust, and ensure your pudding mix is GF (most Jell-O brand puddings are gluten-free, but always check the label).
Q: How long does it last in the fridge?
A: This Easy No-Bake Oreo Lasagna Dessert will stay fresh for up to 5 days. However, the crust will become progressively softer. Days 2 and 3 are the “sweet spot” for texture.
Q: Can I use almond milk for the pudding?
A: Be careful. The enzymes in some plant-based milks can prevent instant pudding from setting, leaving you with a watery layer. If you must use almond milk, reduce the liquid amount to 2 cups total for two boxes of pudding, or look for a pudding mix specifically designed for non-dairy milk.
Q: Why is my cream cheese layer lumpy?
A: This happens if the cream cheese was too cold. If you are stuck with lumps, you can try to push the mixture through a fine-mesh sieve before folding in the Cool Whip, but prevention (room temp cheese) is best.